Extension Request Tutorial
This tutorial focuses on creating an extension request form for your fanworks exchange so that people can complete a form to ask for an extension. It also provides you with a way to track extensions easier.
Create Airtable Account
To start, you'll need to create two accounts. I recommend that you use google login if your mod team shares a gmail account, that way there's no additional passwords to remember or share.
Airtable Airtable is a cloud-based database-spreadsheet hybrid which allows you to leverage the complicated features of a database, with the ease of use of a spreadsheet. If you can handle google sheets, you can handle Airtable!
Creating the Base/Table
If you're not very coding savvy, you'll want to follow my directions for naming and what fields to create exactly as this will prevent you from having to edit the code.
In Airtable, create a new base in your workspace by clicking "Add a base."
noteAirtable may provide an initial base for you. You can absolutely edit that base instead of creating a new one.

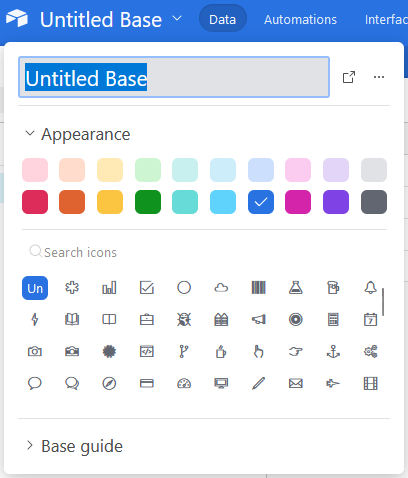
At the top click the "Untitled Base" to change the name to "Extension Requests". You can also set the icon and color to your liking.

Rename "Table 1" to "Extensions".
 )
)
🎉 Congrats! You've set up your first base and are ready to customize your fields.
Customizing Fields
The instructions below are not step-by-step as I really encourage you to click through Airbase to learn about it's options. It's a super useful organization tool!
All bases come pre-populated with four fields. You can edit the four initial fields and create three more for a total of seven. In the end you should end up with the following fields:
![]() )
)
Field Details
| Field Name | Field Type | Options | Notes |
|---|---|---|---|
| AO3 Username | Short Text | ||
| Status | Single Select | Approved Fulfilled Waiting for Update Past Due | Re-use the initial status field by dragging it to the correct position, then update the options. |
| Date | Date | ||
| Method of Communication | Single Select | Email Discord | Set-up with options you have for communication. This is so people can select how they want you to send them their approval. |
| Discord Username | Short Text | ||
| Twitter Username | Short Text |
If you don't use Tumblr or Discord for communications you can delete these fields. There are instructions for removing these fields from the code. If you're feeling super confident or are code savvy, you can change these to other forms of communication, i.e. Twitter username, Dreamwidth username, etc.
To Edit Existing Fields
Click on the down caret and select "Edit field".

Update the name, select a new field type, or change options, as needed.

To Add A New Field
Click the large plus at the end of the existing fields.
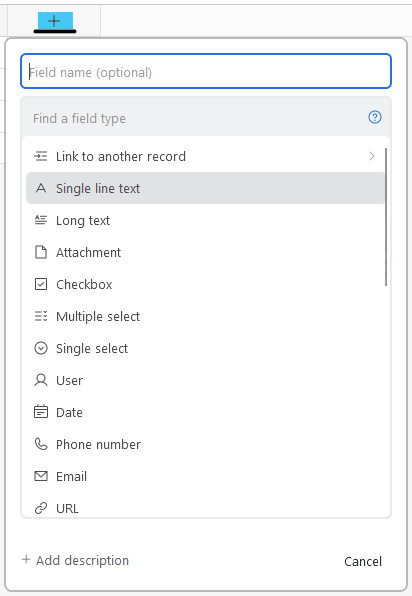
Add the Field Name, select the type, and complete any options that appear.
The Status Field Explained
The status field exists for the mod team to keep track of what the progress is on the extension. As requests come in, they are not assigned a status.
As you review, update, and contact participants, you will be changing this field.
- Approved - You've reviewed the request and let the participant know they're good to go.
- Fulfilled - They posted their work. No follow-ups are needed.
- Waiting for Update - You've hit the initial deadline and haven't heard from them. You've sent a check-in. I leave this status for up to 24 hours after the check-in has set.
- Past Due - PANIC MODE. There has been no reply to the check-in for 24 hours and there is no posted work. Time to consider posting for a pinch hit or defaulting them.
Setting Up Form And Calendar Views (Optional)
The grid view that shows up initially isn't the only way to view the data that Airtable provides. There are several other ways to view data that makes things easier to manage. I encourage you to explore the options for what works best for your mod team. The two below are my personal faves for this type of base.
To Create a New View: In the left hand sidebar at the bottom, click the plus next to the new type of view you'd like to use. You can name these views whatever you'd like as they don't impact the code in any way.
Form View
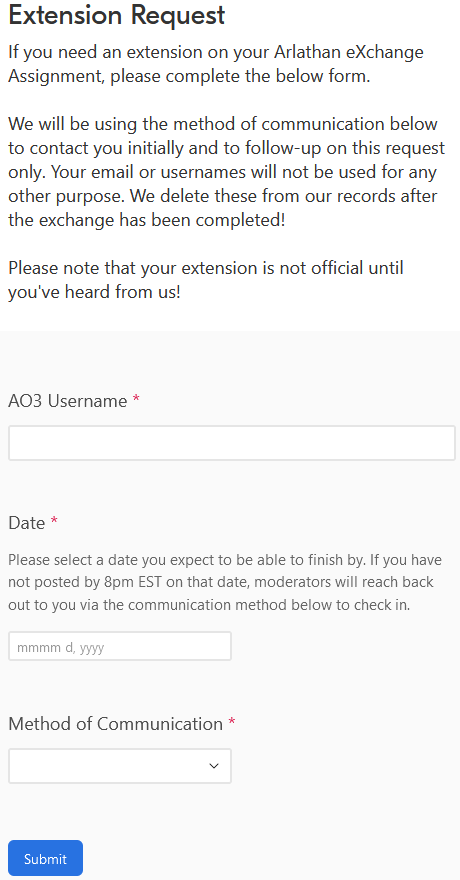
Sort of the meat of the idea, but optional nonetheless! The form allows you to create a form that participants can complete to request an extension. I won't walk you through a step-by-step set-up, but I will give you some hints and tips!
Tips & Hints:
- Be sure to explain the form as a whole. Feel free to use the language I have below as a guideline. You'll want to address how information is stored - I recommend not storing it past the end of the exchange and actually deleting all entries. This allows you to comply with various privacy laws and reuse the form every year.
- DO NOT LIST THE STATUS FIELD ON YOUR FORM. That field is for the mod team to keep track of that status of the extension and participants shouldn't have access to it.
- Set all fields as required. Because the email and username fields are conditional, they are only required if they are displayed!
Adding Help Text
You'll notice that the date field has additional information/instructions.
To add this, click on the field in the form view and complete the "Add some help text" section.

Making A Field Conditional
Toggle the "Show field only when conditions are met" to on.
Set your condition to "When Method of Communication is" and the name of the field. For example, for the email field you'd select "When Method of Communication is Email".

I recommend you do this for all emails and usernames you request as someone only needs to provide you one.
Other Form Options
At the bottom of the view, you'll find various options you can experiment with. I turn off "Show 'Submit another response' button" and "Show a new blank form after 5 seconds" for this form, as people should only be submitting it once.
I also turn on sending an email as a back-up in case the calendar does not sync.
In addition, I do always customize the message shown after submission. Feel free to use my wording as a guideline.
Thank you for requesting an extension. The mods will review your request and get
back to you within 24 hours at the latest.

Please keep in mind that your request is not official until you hear from us!
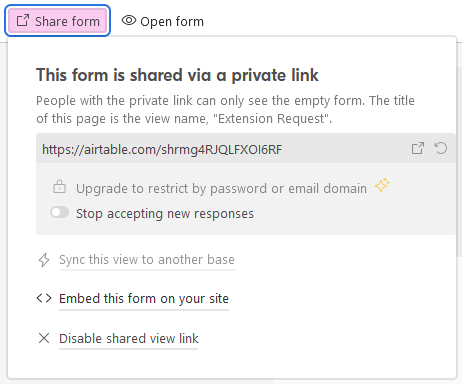
Sharing Your Form
At the top you can get a share link for your form. This can be added to any of your exchange information just like any other link can. This menu also allows you to get code for an iframe embed, or to turn the form off so that it no longer can accept responses (a good idea between exchanges).
Calendar View
The Calendar View is useful for two reasons: first, it gives you a visual of what extensions are due on what days and their status, and second, it allows you to get a calendar link to sync to your google or other calendar app.
Once again, I'm not doing step-by-step instructions, but providing hints for setup!
Customizing Labels
For me, the most important thing here, is seeing the AO3 username on the date. If I have to reach out to someone for an update, etc, I'll sign into the airtable. You may want to include communication info, etc.
Click on customize labels and toggle on items you want to show and off items you don't. You can also rearrange the order of items by clicking the six dots on the right side of the field and dragging up or down.
Since the Calendar is being generated from the date field, there's no need to display it!

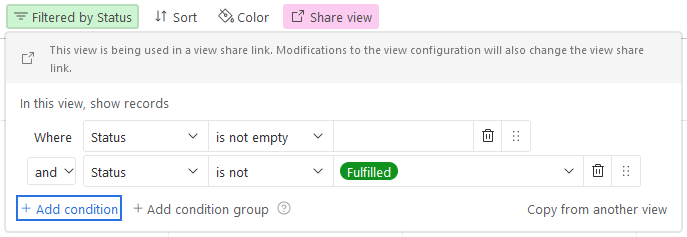
Filtering By Status
Calendar view is most useful if you filter the records to only show approved and outstanding extensions.
To do this, click "Filtered by" and choose "Status is not empty". This will make sure that it's been at least approved. Then click "Add condition" and set the second condition to "And Status is not Fulfilled" to exclude completed extensions.
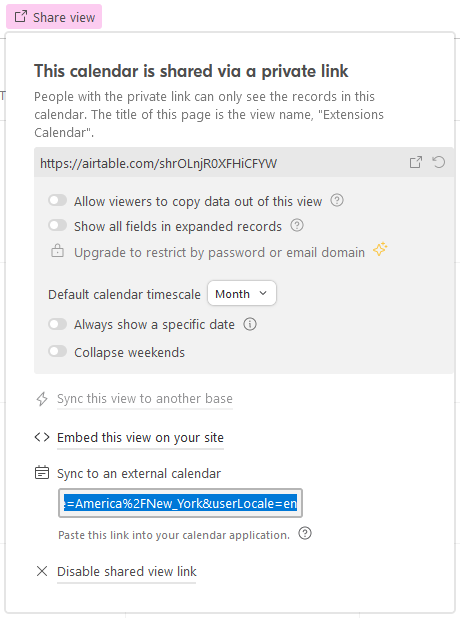
Syncing To Your Calendar
To sync to your calendar, click "Share view" on the main toolbar, and then select "Sync to an external calendar".